File > New ...2. Paste your site screencapture in the artboard (Print Screen SysRq );
CTRL + V3. Resize the imagem proportionally for 400x300;
Object > Transform > Scale4. Select the Imagem and Add the Effect 3D rotate;
or
Shift + F8 and add the value 400 widht and 300 height
Effect > 3D > Rotate
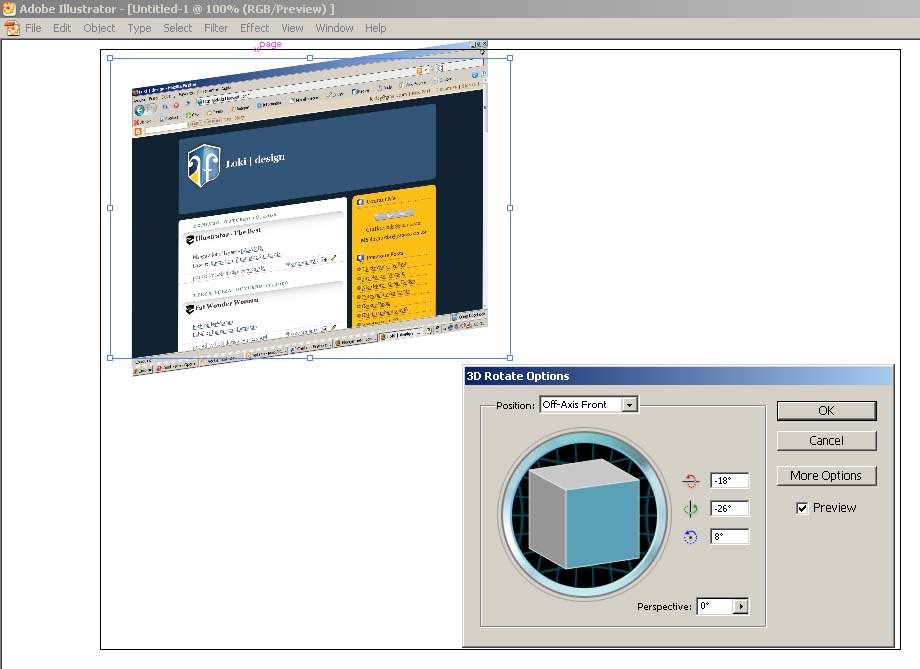
3D Rotate Options5. Duplicate the imagem;
Add those value;
X: -18º (Red Arrow)
Y: -26º (Green Arrow)
Z: -8º ( Blue Arrow)
Perspective: 0
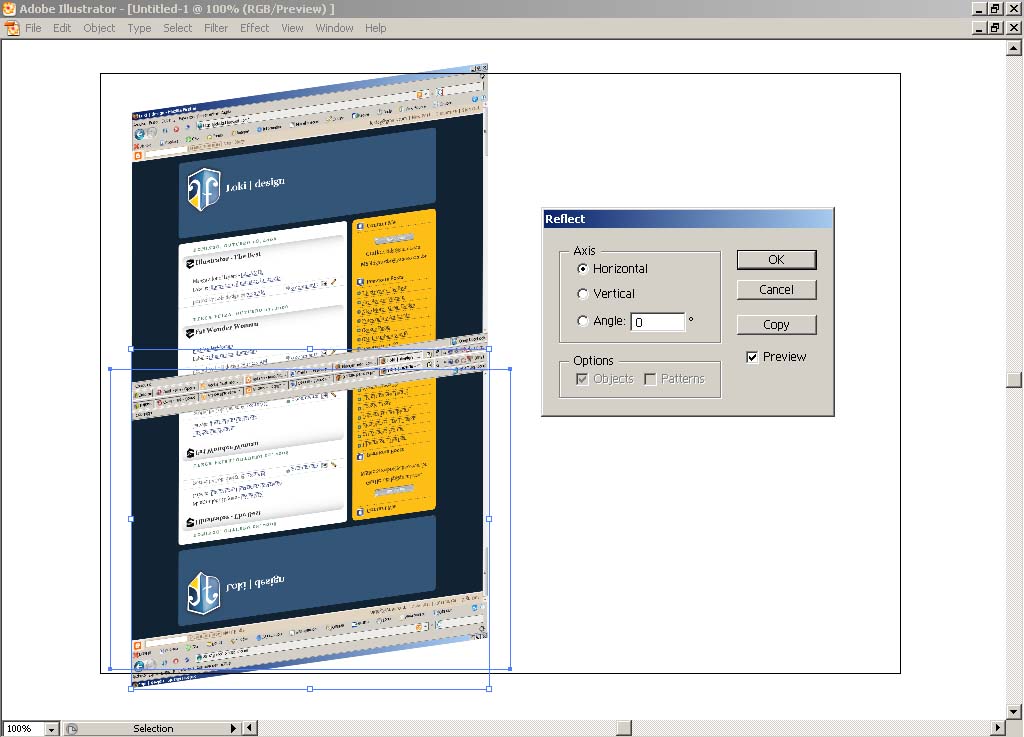
Drag the image in a diferente position and hold the Alt key when release.6. After the imagem was duplicated reflect then in the axis of X;
Object > Reflect;
Select X Axis Radio buttons, and press ok;r>
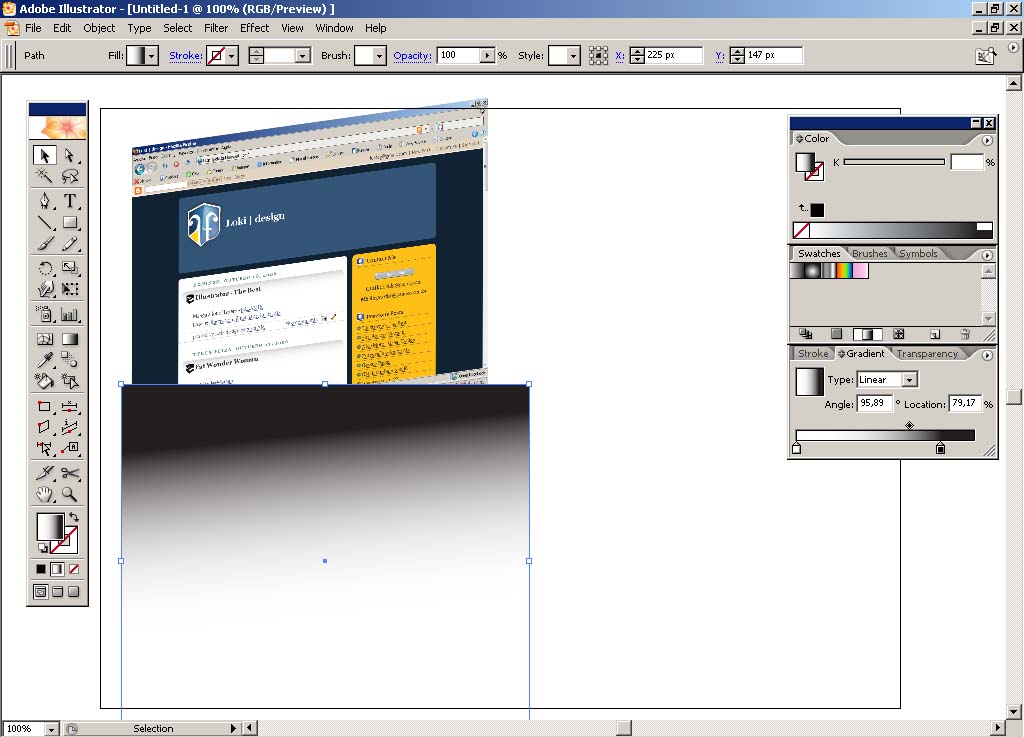
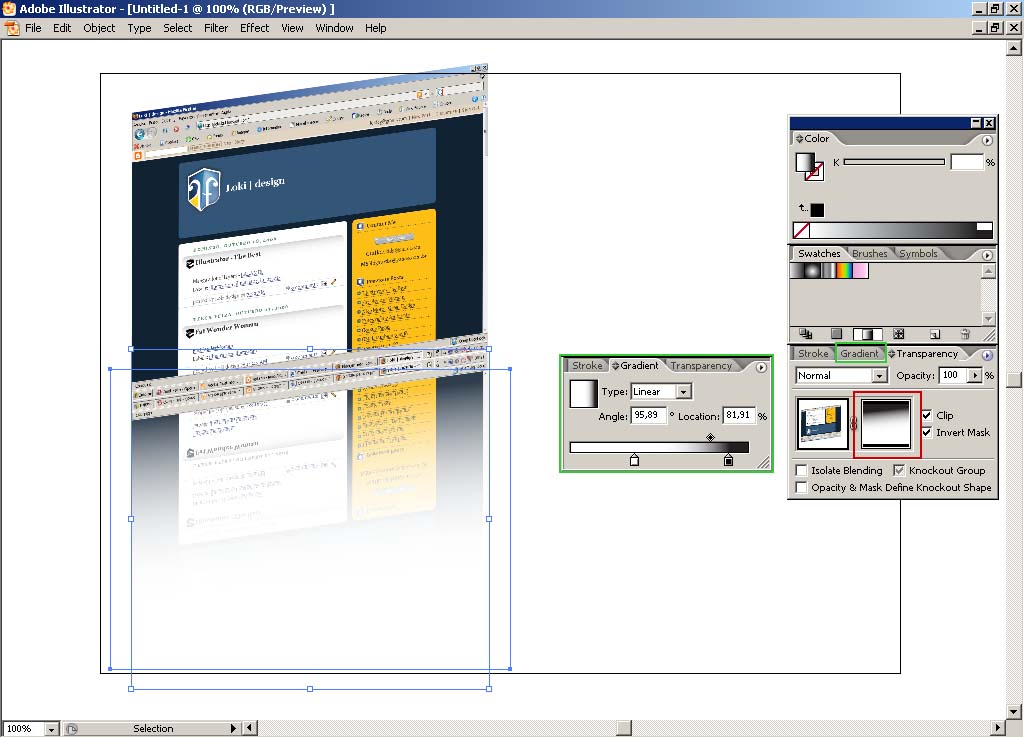
7. Create a gradient rectangle above the mirrored image;
- Use the rectangle tool (shortcut M) and create it above the mirrored image;
- Fill the rectangle with the grantdient on swatches and use the Gra diente Tool (G), to adju nst the gra ndiente.
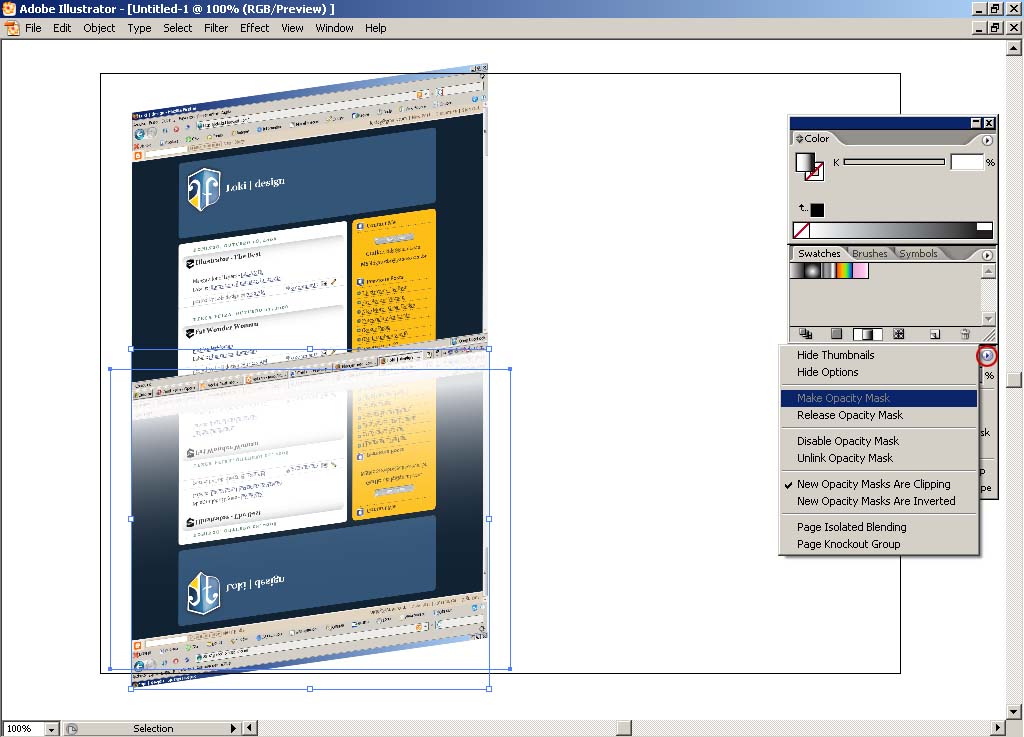
8. Create a Opacity Mask;
- Select both objects (mirrored imaont>gem and gradient rectangle);
- Go to Transparency tool box (Shift + CTRL + F10)
- Click on right side arrown sign on the image for a red stroke and select the option Make Opacity Mask.
9. Configuring the Opacity Mask- Select the Option Invert Mask;
- Select the Gradient Opacity Mask Option like the red stroke on the imagem;
- Go to Gradiente Option and Configure like you want, more black less reflect.
I think with that you can explore the possibilities
Nenhum comentário:
Postar um comentário